The first DIY project in our house took place only the day after we moved in, and what a difference it made!
Our kitchen is a little tired. It may have been tired since it was put in in the 1980s when the house was built: for instance the drawers have not all been installed at the same heights, and one even gets wedged on the knobs for the hob as you open it. It has one string and fibreglass (!) counter-top and one tiled. And since this rather dubious installation, the kitchen has been well used, particularly by the somewhat dubious-sounding tenants when the house was rented out. In order to sell, the room obviously needed a lick of paint, which is was given, right over the holes in the wallpaper and even the tiled counter. Which gives an interesting effect.
Yet the worst thing when we moved in was the fact that a row of cupboards had been suspended from the ceiling, stretching across the room. They blocked out almost all the light, which is an achievement for a room with three windows and an external door.

(Looking in from outside) cupboards blocking all light...
So our first goal, especially while we still had our parents with us, was to pull the cupboards down. But, as has turned out to be the case with all our 'small' projects since, this task turned into more of a mission.

Step 1: Remove back panel
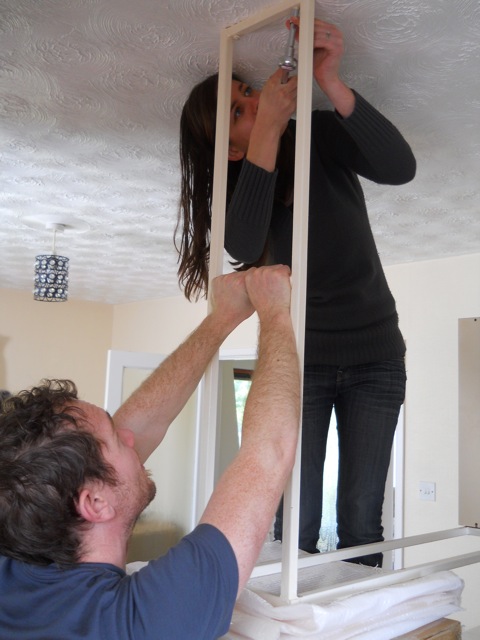
When mounting 'wall' cupboards a cross a room, they obviously cannot be mounted onto the walls. So instead they were hung inside a large metal frame suspended from the ceiling. Which turned out to be a nightmare to remove.

Step 2: Unscrew and remove cupboards from frame
The cupboards themselves came out fairly easily from the frame, just a few screws and a gentle push and out they came. Makes you wonder how secure they really were.
Step 3: Try and work out how on earth to detach the frame from the ceiling
Then came the fun part. No matter how much we tried to remove the bolts holding the frame to the ceiling, they weren't budging a centimetre. So the only option seemed to be to survey them from above, i.e. from the loft. So up the other half of us went, gingerly making way across the unlit, un-boarded loft, complete with exceedingly thick insulation.

Step 4: Enter the loft to remove the bolts!
As it turned out, the bolts were the longest I have ever seen, stretching through the ceiling and through the joists in the loft above. After a fair amount of message relaying and tool passing, the nuts were removed from the bolts in the loft and the frame could be pulled down. Mission accomplished! And what a difference it made to the light in the kitchen. Still a long way to go to make the kitchen as we want it, but definitely a huge improvement.


Step 5: Remove the frame and survey the chaos!
No comments:
Post a Comment